Showing posts with label Recipes. Show all posts

A few from this week...

Two lunches (okay, technically three - I made the first lunch twice) to post today from this week. Both chics took this lunch this week:
Orange segments with blueberries, Homemade granola bar, Carrot and okra chips, Black olives, Turkey and cheese skewers.

These granola bars are called Playgroup Granola Bars. I used to make them all the time. That was before I found the Smitten Kitchen granola bar recipe! Anyway, I've been making Smitten Kitchen's granola bars for so long that I completely forgot about this recipe. One of my friends made them the other day and it reminded me of them. Although I like the Smitten Kitchen's granola bars more, the Playgroup Granola bars are much easier and require less special ingredients.
The other lunch for the week was a leftover lunch...Big chic took leftover Pioneer Woman's Spaghetti and Meatballs.

Spaghetti and meatballs with parmesan cheese, Celery sticks, Fruit leather

Pioneer Woman's Spaghetti and Meatball recipe is really good and fairly easy. I made a batch of it a couple months ago and froze the leftovers in the trusty Foodsaver. All I had to do for dinner was cook the pasta and heat up the sauce. It's perfect for a busy weeknight and it's even better the next day (or a few months later :) )

How to Make Meatloaf in the Summer

Well, hello there! The big chic starts school next week and my mind has been turning towards lunchboxes and Foodie Footsteps. It's been a great summer, and although I haven't been blogging, I've thought about my blog sooooo many times. I should have blogged more this summer about recipes that I was making, but we have been so busy. A Disney trip, a visit to the great grandparents across country, and countless play dates, summer camps, and movie days have occupied my mind as well as my time. I hope that I still have some readers left after my summer break!

Anyway, for those of you that are still left, I thought I'd share a very interesting recipe that I rediscovered this summer. I say "rediscovered" because I've had the recipe for quite a while stuck in one of my many binders filled with printed, copied or handwritten recipes that I've collected over the past fifteen years. If you're like me, you have an entire section of your kitchen dedicated to this mish mosh of recipes. The hubs complained about it constantly. A very good friend and fellow foodie told us about an e-reader for your kitchen. I thought it was an awesome idea, but the hubs, being the money saver that he is, had a hard time justifying the purchase. Well, a few weeks ago, he finally broke down (or I wore him down, depending on who you ask) and he bought me a Demy Kitchen Reader.

My New Best Friend...the Demy
It is SO cool. You put all your recipes into the Key Ingredient website and sync them to the Demy. You can create your own cookbooks and add pictures and everything. I thought adding the recipes to the Key Ingredient website would be horrible, but most of my recipes are from magazines and websites and you can just cut and paste them from the website. Now, I don't have to print out recipes or take my laptop into the kitchen (which REALLY freaks out the hubs). All my recipes are at the tip of my finger...literally...it's touch screen. Such an awesome idea. You don't have to have a Demy to use Key Ingredient, either. You can create an account and add recipes to it (similar to All Recipes). Here are links to both in case you'd like to take a gander: For the Demy For Key Ingredient
There is a point of all of this rambling, I swear. One of the bonuses of putting my recipes into the Key Ingredient website, is that I found a bunch of recipes that I completely forgot about. One of those recipes was a meatloaf made in the bread machine. Yes, you read that right...meatloaf in the bread machine.

Now, if you've read my blog, you know that big chic loves some meatloaf! But, since we live in Texas, summer in unbearably hot and the idea of baking in the oven is not a pleasant one. Meatloaf is usually not on our summer foods list. The bread machine puts off very little heat, though (especially compared to the oven). I decided to give it a shot, I mean, how bad could it be? I'm guessing you could use any meatloaf recipe as long as it made to same volume. This is the recipe I used...
Breadmaker Meatloaf
MEATLOAF
1 medium onion, chopped
2 lbs ground sirloin
1 cup mushrooms, sliced (I used dried wild mushrooms that I rehydrated in some boiling water)
2 tsp salt
2 Tbsp parsley, chopped
1 tsp garlic powder
1/4 tsp pepper
1 cup bread crumbs (I used Panko)
2 eggs, beaten

GLAZE
1/2 cup ketchup
1 Tbsp brown sugar
1 tsp prepared mustard
Combine all meatloaf ingredients in a bowl. Mix glaze ingredients in a small bowl and set aside.


Remove the paddle from the bread machine pan and press meatloaf into the pan.


Next is the hardest part. You need to set the machine to skip the rise and proof setting and to bake for 1 hour and 10 minutes. My machine doesn't have a way to bypass the proof or rise cycles, so I had to start a bread cycle and let it go through the steps. I put the pan into the bread machine when there was 1 hour and 10 minutes left in the bake cycle. Needless to say, since a full cycle on my machine is almost four hours, this recipe would require some pre-planning. (It would be worth it though since the proof and rise cycle use almost zero heat!)
When there are 30 minutes left on the bake cycle, open the machine and pour the glaze over the top of the meatloaf. Close the lid and continue to bake.

Once the meatloaf is done, allow it to cool for a minute and drain the juices. Remove from the pan...gently...NOT like this...

Slice and serve


I certainly won't say that I had the most supportive team of taste testers for this. When I told the hubs what we were having for dinner, he crinkled up his nose and said very slowly, "okay". The chics said, "in the bread machine?" and made yuck faces. After tasting it though, all of their skepticism disappeared. It was surprisingly moist and delicious. We'll be making meatloaf in our bread machine again. It makes me wonder what other things I could make in the bread machine...hmmm...

Lasagna Soup

Lasagna is soooooo good, but I rarely make it because I feel so guilty eating it. The same things that make it great are the same things that make it bad for you...cheese, cheese, and more cheese! I came across a lasagna soup recipe that had all the flavor of lasagna with only a bit of cheese. It's Paula Deen's Tastes Like Lasagna Soup. I know that Paula Deen is not normally known for her healthy cooking, but this recipe is actually very healthy. I made a few modifications, though, to boost the nutritional value even more. I added a buncha spinach and omitted the mozzarella. I also added a small spoonful of ricotta cheese to the top. YUM!

I packed the soup in her lunch jar and then sent a few snacky type things in a little bento to eat with it.


Oreo, Goldfish crackers, Lasagna soup, Dried cranberries

Elvis Roll-Up

Tomorrow's lunch is a popular item with our family...okay, everyone except the hubs who insists that peanut butter and bacon is gross. But he is so SO wrong! They compliment each other perfectly! I think it's an even better combination that peanut butter and chocolate. Seriously! When I was pregnant I went through a grilled peanut butter, bacon, and honey sandwich phase. (No wonder I gained 53 pounds!) But I still love the sandwich post-pregnancy and this is a much lighter way to enjoy the sandwich.


Elvis roll-up, banana (to add to the rollup at lunch so it doesn't brown), carrot slices, Cottage cheese with strawberry.
.

Elvis Roll-up

1 tortilla

2 Tbsp natural peanut butter

1 banana, sliced lengthwise

1 slice thick cut bacon, cooked till crisp

1 Tbsp honey

Spread peanut butter on the tortilla. Lay bacon and banana on one end of tortilla. Drizzle with honey and roll up. (If you're feeling adventurous, try it on buttered bread and grill it as you would a grilled cheese. You can thank me later ;) )

Salted Butterscotch Brownies


No lunch today, but I thought I'd share a brownie recipe that I made to take to a little gathering yesterday. I love the salty sweet combination and these are a great combination of the two flavors.
Salted Butterscotch Brownies

1 cup brown sugar, packed
1 egg
1/4 cup vegetable oil
1 tsp vanilla
1 tsp butter flavoring
3/4 cup all purpose flour
1 tsp baking powder
1/2 tsp salt
1/2 cup butterscotch chips
Sea salt

Heat oven to 350 degrees and spray (really well) a mini muffin tin. Combine first five ingredients and mix well. Add flour, powder, and salt and stir in butterscotch chips. The dough will be very thick.
Place a heaping tablespoon into each mini muffin spot. Sprinkle a generous amount of sea salt on top of each brownie. Bake 13 minutes. Do not overbake. Cool completely on cooling rack. I use a fork to pop them out of the pan. This makes about 20 or so.
I took these to an Olympics watching party. The host (shout out to Amber!) had the Ben & Jerry's ice cream flavor that they made in honor of snowboarder Hannah Teter. It's called Maple Blondie. So Amber says, "I bet these brownies would be good in that ice cream!" And I'm like, "Oh yeah!" Sooooo, we did and it was AWESOME!! A match made in heaven!

We had a little drama with the lunch yesterday. I don't know if it's cause she's been sick or moody or what, but the chic decided to buy her lunch on Thursday instead of eating what I packed her. I don't know how exactly she figured that it was okay, but her exact words were that she wasn't "feelin it". Are you kidding me? She told me she doesn't like vegetables. Again, are you kidding me? This is my kid that could easily be a vegetarian. I was really really frustrated with her yesterday and told her she could just buy lunch from now on. Fast forward to today where she's spent the better part of this morning telling me all the vegetable that she loves and how she can't wait to see what her lunches are like next week. ????????? Seriously? When did my cute little six year old turn into a moody, fickle sixteen year old?
UPDATED: Turns out all the hoopla about not liking her lunch was because they had cheese quesadillas in the dining hall, and apparently I never let her buy cheese quesadillas. Guess we've got a new favorite on our hands. When I cleaned out her luncbox, I discovered that she had actually eaten all of the sandwiches, most of the cucumber, some of the cantaloupe, and a few bites of the granola bar. So, it seems that she ate TWO lunches on Thursday. And although I'm not thrilled that she bought lunch without permission, I'm relieved to know that it was nothing major in her eating habits! We'll see what happens in the weeks to come...

Flowers and Granola

The rainbow lunch from yesterday was not such a big hit. The second that the chic got in the car she told me that she didn't like her lunch. She said that she doesn't like the veggies cut up so small. Apparently I'm supposed to make "fancy" lunches WITHOUT cutting the veggies too much. Lotsa rules involved with the whole lunch making process :)

SO, tomorrow, we get back to the types of lunches she loves...with lots of flowers and minimal cutting!


PB&J sandwiches with homemade blueberry jam, Cantaloupe flowers, Chocolate chip granola square, Cucumber and carrot cut outs

A few days ago, the chic asked me to make chocolate chip granola bars. It was perfect timing cause Smitten Kitchen has just posted a new granola bar recipe that looked awesome! I decided to try it and see how it compared to my usual recipe. The only change I made to the recipe was that I used agave nectar instead of honey or corn syrup. For my dried fruits and nuts, I used coconut, pecans, walnuts, flaxseeds, sesame seeds, dried cranberries, raisins, wheat germ, and, of course, chocolate chips. I doubled the recipe and baked them in a 9x13 pan. I had to bake them for a few minutes more...maybe 15 minutes.
These were hands down, the best granola bars I've ever made! Not too sweet, not too dry...just a bit sticky. The only drawback to them is that I've eaten a ton of them. I ended up freezing some cause I was afraid that I would completely finish them off. I'm going to make them again and plan out my fruit/nuts mix a little more. This time I just threw in a bunch of stuff I had on hand. You should definitely try the recipe!

Chocolate Birthday Cupcakes!

Today, my oldest chic turns six! I can't believe how fast these six years have gone! And how much my life has changed in such a short amount of time. I really love to celebrate the chics' birthdays. I hope that I make them feel special every day, but I can really go overboard on their birthday and not have to feel guilty about it!


The beloved Kindergarten teacher and I decided that because the Valentine's party was scheduled for the day of her birthday, we would celebrate a day early so I could bring cupcakes and not put the kids into a complete Valentine's party AND birthday cupcake sugar induced coma. The chic loves chocolate cake and her favorite has become Gourmet's Double Chocolate Layer Cake. Who am I kidding? This cake is everyone's favorite. The little heading to the recipe states that some of their staffers swooned over it, and I always think that's funny cause I actually have had people swoon after taking a bite. It is THAT good. It is the ULTIMATE chocolate cake. Really! The ULTIMATE!

(This is what the cake looks like in "cake form". This was for Mother's Day last year.)

So, anyway, there was no question about which chocolate cake recipe I would be making for her classmates. At least to her...I was unsure. First, I had never made the cake into cupcakes and I know that it's really just a time adjustment, but still... and then there's the frosting. It's a ganache frosting. Love the ganache frosting, and on the cake, it's glossy and smooth and gorgeous, but on a cupcake, it wouldn't be very pretty. I told her that I would make buttercream to top the cupcakes, but she insisted on the ganache. We were at a standstill for about a week until I came up with a compromise...I would top the cupcakes with buttercream and fill them with the ganache. She agreed.


I wasn't sure how this would turn out, so I made a few extras to test. I have to admit that I didn't think that anything could top that chocolate cake recipe, but I think the addition of buttercream and the surprise of the ganache filling did just that. They were so so good!


I also made some chocolate "6"s to stick into the top of each one. The chic didn't say much about them (after all, she's eaten this cake many many times) but the pictures that the beloved Kindergarten teacher sent say it all...the kids loved them!

"That Sandwich I Like"

For some reason, when the family wants something "light", this is what we go with. This sandwich always impresses me because of it's simplicity...just a few ingredients for such an amazing flavor. The hubs and I call them "Tomato Mozzarella Sandwiches" but the oldest chic can never seem to remember that so she started calling them "That Sandwich I Like". She has called them that so many times that now I know exactly what she's talking about.
Because there are only a few ingredients, it is REALLY important to use the best ingredients. This is the time to bust out the special olive oil and the aged balsamic. They make a huge difference in flavor!

Tomato Mozzarella Sandwich, Chocolate fudge cupcake from The Cakery, Cheez-Its, Red pepper strips, Clementine.

Tomato Mozzarella Sandwiches

1 Vine Ripe Tomato (sliced thick)

2 thick slices buffalo mozzarella

2 slices Ciabatta

A few fresh basil leaves

Aged Balsamic Vinegar

Extra Virgin Olive Oil (La Espanola is our fave)

Salt and Pepper
Drizzle both slices of ciabatta with olive oil and balsamic vinegar and chiffonade the basil. Layer the sandwich...Mozzarella on bottom, then basil, tomatoes and then sprinkle with salt and pepper. Top with second slice of ciabatta.

I think the sandwich is best when it's had a bit to sit and let all the flavors meld together. By the time the chic eats this for lunch tomorrow, it should be perfect!

Kettle Corn!

I had to share one of my new favorite toys...the Whirley Pop. My friend Paige made popcorn in her Whirley Pop for a sleepover a couple years ago and it was the best popcorn ever! I've been looking for one ever since. When we were out Christmas shopping a few weeks ago, the hubs wanted to stop in at a tool store. Ugh! We've been to this tool store several times and it is always torture. He can aimlessly walk around that place FOREVER and there is not a darn thing that interests me there. I usually follow him around playing on my Blackberry the whole time complaining that I'm bored (I admit it!). Anyway, I walk into the store expecting the usual and run right into a whole display of Whirley Pops! I was so excited! So, we bought a few for friends and family and one of myself (of course!)

When we got home, I had to try it out. I could have just made plain popcorn for my first attempt, but kettle corn is our favorite so I tried that first. (Why walk when you can run, right?) It took me three burnt batches before I made a good batch! There are a few tricks to the thing that I had to find out the hard way. First, you really have to spin the thing...like fast (thus the name "whirley" I guess?) And, if you add the sugar in the beginning, it gets too hot and burns more easily. We like our kettle corn with a hint of sugar and salt and less like caramel corn. I've tweaked the recipe that was in the book a bit to meet our tastes. Here it is:

Whirley Pop Kettle Corn

3 T Canola Oil


1/2 cup Popcorn Kernels (I use whatever's cheapest)


1/3 cup Sugar


2 tsp Salt


Preheat Whirley Pop. Add oil and popcorn kernels and close top. When the kernels begin to pop, quickly open the top and add the sugar and salt.


Close the lid again and spin the handle...fast! The popping will slow because the sugar cools it off, but keep stirring and it will start up again. When the popping slows, take off the heat and immediately pour into a bowl. Let it cool, COMPLETELY. Even though there are cool spots on the top, the three year old will inevitably grab popcorn from the still-hot center and burn her mouth (just sayin :))


Still loving my new camera, can you tell? Seriously, though, this stuff is soooo good! You can use up to 1/2 cup of sugar and it will be more caramel corn-ish in it's coating. But, again, stir the thing FAST or it will burn and your house will smell like burnt popcorn and sugar for a week. Trust me!

A Healthier Cinnamon Babka


Happy Thanksgiving! I decided to take a break from my Thanksgiving cooking to post my cinnamon babka recipe from last week. When the chic asked me to make cinnamon bread, I immediately went to an awesome cinnamon babka recipe that I've used for years. It's in The Ultimate Bread Machine Cookbook by Tom Lacalamita. I've had this cookbook for almost 12 years and I think it is the best bread machine cookbook ever printed! I'm not big on baking bread in the machine...I like to use it for dough. And it has tons of awesome recipes for dough cycle, hand shaped breads.
Anyway, I decided to try to make it a bit healthier by adding ground flax and using half whole wheat flour. Make no mistake, I did not cut the sugar or butter. The butter, eggs, sugar, etc...are what make babka so so good. So it's still not the healthiest bread option. Consider it a somewhat improved version. I also wanted to use the Pullman pan. It turned out really well and honestly, I don't think my additions made a difference in the texture or taste. The hubs didn't even know that I did anything different until I told him. I use my bread machine to make the dough, cause it's easy and super easy to clean up. Here's the recipe:

Healthier Cinnamon Babka
(Enough dough for one Pullman pan and one regular loaf pan)

3 eggs

1 3/4 cup milk

3 T butter, softened

1 t vanilla

3 T sugar

1/2 t cinnamon

1/4 c ground flax

2 c stone ground whole wheat flour

3 c all purpose flour

3/4 t salt

1 T vital wheat gluten

1 1/2 T yeast


Filling:

4 T butter

1/2 c white sugar

2 T cinnamon


Topping:

2 T butter

4 T sugar

large pinch cinnamon

4 T flour


Add all ingredients to bread machine in the order suggested by manufacturer. Set to dough cycle.
While dough is processing, mix filling and topping in separate bowls and set aside. Generously butter a Pullman pan.
When dough cycle is done, punch down and let rest for five minutes. Turn onto floured surface and cut off about 1/3 of the dough an set this 1/3 aside for another use (it's a perfect amount for a regular loaf pan).
Roll remaining dough out to 1/4" thick rectangle. Sprinkle filling on the rectangle and roll up tightly. Stretch dough to twice the length of the pan and place in pan in an "S" shape tucking ends under loaf. Cover and let rise till double.
Preheat oven to 350 degrees. Carefully make an indention down the middle of the loaf and brush with a beaten egg. Sprinkle with topping mixture. DO not use the lid for this loaf! Place in oven and bake for 30 minutes or until golden brown.
There are other variations of Babka. Cinnamon, cheese and chocolate are the most common varieties. Anyone remember the chocolate babka from Seinfeld?

Fruit Leather!

I'm going to try to make Thanksgiving/Fall themed lunches this week unless the chic REALLY complains about the lack of flowers and frou frou. I'm really looking forward to moving past Thanksgiving, though, so I can make some Christmas lunches. THOSE will be fun!


Cheese curds, Cucumbers, Flaxseed Cranberry and Pecan Crackers, Homemade Fruit Leather over pecans and dried Cranberries, Turkey leaf sandwich.

I've been wanting to try making fruit leather for a long time. But, it seemed like such a time consuming process that I've kinda put it off and put it off. Well, I'm tired of trying to find all fruit fruit leather and I'm tired of paying so much for it. And really, I just love to make anything I can so that I know EXACTLY what is in it. So, after doing some Internet searching, I came up with a plan of attack and went to it. Here's how it went...

I used frozen strawberries this time. Two bags. Unsweetened. They aren't in season right now, or I would have bought fresh. So, I went with four cups of fruit and a half cup of water. I simmered these, covered, for 15 minutes.


(Everything gettin ready to simmer)

I mashed them with a potato masher and continued to cook, uncovered, until they got a bit thicker. This was only supposed to take 15 minutes or so, but I let it cook for a total of about 30 minutes. Next time I will only do 15 minutes, though. I think I let a bit too much water evaporate. You'll understand why in a minute.


(I don't know why my dad's camera keeps doing this, but this is the best one I have of it after I mashed it)

Then I stuck it in the blender and pureed the whole thing. It thickens up quite a bit when pureed. And as a warning...boiling hot strawberry puree WILL fly out of the top of the blender spout, burn your hand, and make a mess out of your kitchen when you hit the "on" button. Just sayin...I ended up putting a pot holder over the spout (after I treated my scalded hand, that is!)

(You shoulda seen the floor around the blender!)

(The Puree)

Everything I read says that you should line a baking sheet with "oven safe" plastic wrap. My plastic wrap is just store brand plastic wrap and it didn't say anywhere on the box that it was "oven safe". I stuck a piece in the microwave to test it and it didn't melt. That was good enough for me, so I used it. Four cups of fruit will make one baking sheet worth of fruit leather. I must warn you, however, that after being in the oven for a while, the edged do shrink up a bit, but the plastic under the fruit was just fine. After lining your baking sheet with plastic wrap, you pour the puree and level it out. This is important because otherwise it won't cook evenly (I know because MINE didn't cook evenly.)

(Ready for the oven)

Turn the oven to "warm" and wait...
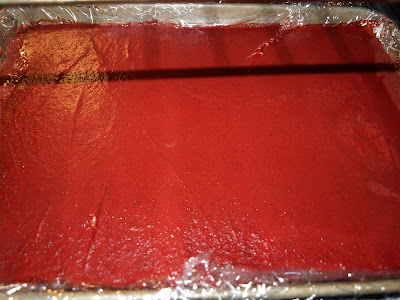


and wait...(you can start seeing where it was thicker and not drying as fast)


and wait...


(This is right out of the oven. I tore off the bottom left corner. You know I'm an impatient cook! The bright spot is the sticky spot where it was too thick.)

I left mine in the oven for about 7 hours before pulling it out. It is supposed to be done when there are no sticky spots left, but since I didn't level mine well, I still had a thick spot that was sticky. I decided to pull it out, though, cause I didn't want the rest to get too dry.

Once out of the oven, the plastic wrap just peels off the back.


I tore it into strips and put it in a plastic baggie. At first I thought that it wasn't such a success. I cooked it too long in the initial thickening stage and when I took it out of the oven, parts of it were more crunchy than dried. And I had the sticky spot in the middle because I did a bad leveling job...okay NO leveling job, whatever. BUT I cut out the sticky spot and after being in the plastic baggie, the crunchy bit softened a bunch.


The last thing to do was test it out on the chics. And as luck would have it, we had one of our friend's kids over that day. So, I gave them all a piece and stood back to watch. It's hard to act like you don't care what they think of it. I was standing there trying to act aloof about it, all the while trying to read their facial expressions without outright staring at them. Anyway, a few minutes later, they came back for another piece, and then another. Pretty soon, they had eaten almost the entire baggie! It was a success!

Next time I make it, I will change a few things...I won't cook it for 30 minutes and stick to the 15 minutes in the thickening stage, I will put a pot holder on the blender BEFORE turning the switch on, I will level the puree, and I will make two pans! Oh, and I think I'm gonna try raspberry!

The Day of Gratuitous Photos

I have needed a "real" camera for so so long. It's probably been 15 years since I had a camera that wasn't a point and shooter. This blog has really made me realize how limiting the all automatic cameras are and made my hunger for a new camera even greater. The hubs doesn't want to spend the money. He NEVER wants to spend the money. I keep threatening that one day I'm just going to go buy one. Well, guess what?? Today wasn't that day! But I did borrow my dad's camera! I think that I took 100 pictures of food today in all sorts of configurations. What do these crackers look like in this light? What about in this light? What about with a sprinkle of crumbs? Seriously, I've been lurking on Foodgawker too long. Have you been on Foodgawker? It's unbelievable. I can suck up hours and hours looking at all those photos. They are gorgeous, mouthwatering, and definitely NOT taken with a point and shoot camera. I've submitted items to Foodgawker before but they always get rejected due to photo quality. For about a year, I have dutifully submitted items and waited by the Blackberry just certain that this photo would be the one. None have been the one. The same reason I love Foodgawker, is the same reason I hate it. They are sooooo freakin picky about their photos. So, I'm gonna start borrowing my dad's camera here and there and maybe one of my submissions will meet their standards. Doubtful, but just maybe.

There really is a lunch involved in all this camera hoopla. Her lunch for tomorrow is some leftover Pad Thai from one of our favorite Thai restaurants in the area. I went for lunch today and felt guilty the entire time. The chic loves Pad Thai, and I could just see her sitting in the cafeteria eating her crappy hot lunch because I was too busy last night to pack her a lunch. I felt the only right thing to do was to bring her some leftovers!


Chicken and Tofu Pad Thai, Chocolate chip cookie and Fruit Bites, Dry roasted peas, Flaxseed, Cranberry, and Pecan Crackers and cheese.


Here's a close-up of the Pad Thai just cause I COULD take a close-up that was in focus.


These crackers are addictive. They are a variation on the Flaxseed, Fig, and Walnut Crackers from Epicurious. I love their version with figs but I don't usually have dried figs in the house. I've found that you can make them with any dried fruit and nut combination (dates and walnuts are also yummy). My youngest calls them cookies and she's kinda right. They are a bit of a cookie/cracker hybrid. They've become kind of a joke with one of my friends. She finds the idea of making homemade crackers so incredibly outrageous (she doesn't cook) yet she will spend hours handcrafting invitations to her kid's birthday parties. The first time I made the crackers, she just happened to come over and when I told her I made them, she said, "Well, of course you did. Who doesn't make their own crackers?" So now when she does some crazy crafty thing that I could never think of doing, I say, "Well, of course you did. Who doesn't dye their own Easter grass?" We go back and forth. The funny thing is that she LOVES these crackers and will eat the entire batch before they're even cool. She could make them if she wanted to...the recipe is really simple. But then we wouldn't be able to harass each other and where's the fun in that?

Flaxseed, Cranberry, and Pecan Crackers
(adapted from Epicurious recipe)

1/3 cup whole flaxseed
1/4 cup ground flaxseed
1 1/2 cups whole wheat flour
1/2 tsp baking powder
1/4 tsp Kosher salt
1 tbsp brown sugar
4 tbsp butter, room temp
1/4 cup chopped pecans
1 cup chopped dried cranberries
1/2 cup milk

Mix first seven ingredients together until combined. Stir in pecans, cranberries, and milk. Form into a ball, wrap in plastic wrap and refrigerate for 10 minutes. Remove from refrigerator and on a floured surface, roll out to 1/8" thick. Cut into desired shapes and place on ungreased cookie sheet. Bake at 325 degrees until golden brown, about 20 minutes.

Croque Monsieur

Weekend lunches are particularly difficult meals for us. We are usually running around here and there and and we seem to end up at a restaurant for lunch. This drives me crazy. As much as I love to eat out, I find it frustrating that we have all of this perfectly good food at home but my family is too spoiled to eat "just a sandwich" for lunch. The only way I can convince my family to eat lunch at home on the weekends is to make something they love. This weekend, it was Croque Monsieur sandwiches. You never know whether the big chic will eat a whole sandwich or a half, so I always make extra. She ended up eating a half, so the remaining sandwich is her lunch for tomorrow.


Croque Monsieur sandwich, Wallaby Organic Yogurt, Roasted beets, Tomato slices, Radish, Vanilla Almond Granola, Cucumber slices

The beets are experimental. A year or so ago, I made beets and the chic hated them. It's the only food I've ever heard her declare to "hate". I love beets, though, and last night as I was getting ready to stick some in the oven, the chic walks in. She asks what they were. Knowing that if I told her they were beets she would never have tried them again, I lied and said that they were red potatoes. She tried one and she loved it! She kept grabbing them off of the baking sheet and ended up eating a handful before I could get them in the oven. I'm hoping that maybe she's changed her mind. So, the leftover beets are going in her lunch just to see what happens. She may bring them home untouched, but she might not!

Croque Monsieurs are soooo good! Basically they're just a ham and cheese with the addition of a cheese sauce. When La Madeline restaurants became popular years ago, it was the hubs favorite thing on the menu. I decided then that I'd better learn to make them. It's hard to vary on them much. We've made turkey versions also but the rest of it always remains the same. Here's how I make them:


Croque Monsieur Sandwiches
Makes 4

8 slices of whole wheat bread, lightly toasted

8 slices of Swiss or Gruyere cheese

8 slices of ham

Dijon mustard to taste

2 Tbsp butter

2Tbsp flour
1 1/2 c Milk

1/4 cup Shredded Parmesan

1/2 cup Shredded Swiss or Gruyere, divided

pinch freshly grated nutmeg

salt and pepper to taste

Melt butter in saucepan and stir in flour until smooth. Slowly add milk and continue stirring until thickened. Remove from heat and stir in nutmeg, salt, pepper, Parmesan cheese, and 1/4 cup Swiss. Stir until cheese is melted.

Spread Dijon mustard on four slices of toast. Place mustard side up on a baking sheet and top with two slices of ham and a slice of cheese per sandwich. Spread thin layer of cheese sauce on the remaining toast slices. Place them cheese sauce side down on the sandwiches. Ladle remaining cheese sauce on the top of the sandwiches. It will be a pretty thick layer of sauce. I usually let it cool a bit to make it thicker so it doesn't run off the sandwiches. Sprinkle the remaining Swiss cheese on the top. Bake 400 degrees until brown and bubbly on top.

A Lame Lunch and an Awesome Butternut Squash Lasagna

Today's lunch was not very exciting or pretty. More functional than fancy. It was field trip day AGAIN and it got cancelled due to rain AGAIN. But, I got the cancellation e-mail on my Blackberry while I was driving to the school this morning, so it was obviously too late to change things up. So, field trip lunch part four...

Fruit Bites, Sugar Snap Peas, Carrot Chips, Baby Banana, Pirate Booty, Hot Dog Wrap
Although it was kinda lame, there were a few yummy things.
-First, carrot chips - YUM! They are crunchy and sweet and a little salty. They are obviously not as healthy as fresh carrots, but are great for a bit of variety.
-Then, I found out that a HOT hot dog will stay warm until lunch when wrapped in several pieces of aluminum foil. One of the dance teachers at the chic's dance studio suggested this when I was complaining about field trip lunches and it worked wonderfully! I just wrapped it in the tortilla and heated it in the microwave. Then I wrapped it in a couple sheets of aluminum foil and stuck it in the bag as far from the banana as possible. I'll remember that little trick for future field trips!
-I have to share an awesome recipe that I found a few days ago - Baking and Books' Butternut Squash Lasagne. Everyone in my family loves butternut squash so I try to keep it around in the fall. I love the combination of butternut squash and pasta. Butternut squash lasagna is always awesome BUT what made this one different, and in my opinion far superior, were sage and thyme. Sage is such a great fall flavor and it made the lasagna stand out from the others. Here it is fresh out of the oven:
and a slice (one day I'll have a good camera!):
This one will be in my permanent fall recipe collection. It was scrumptious!
-There's no lunch for tomorrow (student council pizza day) so this is my last post of the week. Everyone have a safe and happy Halloween with your little trick or treaters!

Pumpkin Trifles

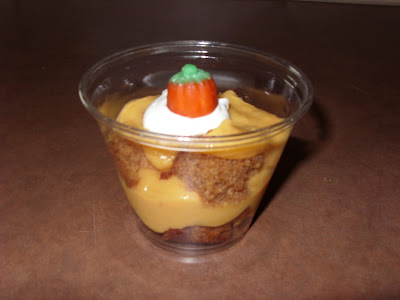
The chic's class is in the midst of a Fall unit and are sampling all sorts of pumpkin treats today. So, when the teacher asked for parents to send something, you know I was totally into it! Problem was, I couldn't decide what I wanted to make. I figured that pumpkin bread and pumpkin pie were too predictable. But I also didn't want to make something that was beyond your average Kindergartner's palate (like pumpkin mincemeat bars which I think are to die for!). Plus, the chic insisted that I make something "cute", AND I had the hubs saying, "You know this is your debut at the school. They all know you like to cook. They're gonna be waiting to see what you come up with." Good thing I work well under pressure! I decided that all Kindergarteners like pudding and they all like cake. So put it all together and what does that spell? TRIFLE!


Pumpkin Trifle (for 20 mini-people)


2 large boxes Jell-O Vanilla pudding mix

4 cups milk

2 cups Pumpkin pie filling (yes the filling, not the solid pack pumpkin)

1 loaf pumpkin bread, cut into small cubes

Cool Whip

20 Pumpkin Mallowcream Candies

Combine the pudding mix, milk, and pumpkin pie filling. Stir for a few minutes until it begins to get thick. Refrigerate until firm. Divide pumpkin bread cubes in half and place in the bottom of 20 small plastic cups. Top with half the pudding. Place remaining bread cubes on the pudding and layer the rest of the pudding on top. Just before serving, put a dollop of Cool Whip on each one and place a pumpkin candy in the center. (The candies will run a bit if you let them sit in the Cool Whip too long.)


For a thrown together little pumpkin treat, they turned out really good. I'm thinking of making a more adult version for Thanksgiving with a Bourbon whipped cream layer and candied pecans. I'll keep ya posted!

Quiche Face

The family loves quiche. I think it may be the hubs favorite food, and it is up there in the faves list for the chic as well. I made a rosemary bacon quiche for dinner last night and took a bit of it to make a muffin sized quiche for lunch.

Rosemary bacon quiche - Trail mix with Whole Grain Cheerios, dried cranberries, and pecans - Banana crumb muffin, grapefruit segments

The quiche is based on an awesome recipe that I spotted on Foodgawker. The recipe (here) has a hashbrown crust and used Swiss cheese. I didn't have any potatoes so I made a rosemary pie crust instead. I also used Havarti cheese instead of Swiss. The family loved it. We ate all but two pieces of it for dinner and the hubs and the oldest chic ate the other two pieces for breakfast. The face was made with carrot and sugar snap pea eyes, a red bell pepper mouth, and rosemary hair.

Lastly, if you have a Facebook account, I've created a Foodie Footsteps group. I've been posting links to my blog posts on my wall because some of my friends follow me through Facebook. I know, though, that not all of my Facebook friends want to see what my chic is eating for lunch, so I've always felt kinda bad about filling up their home screen with my lunches. Now, I can post my blog links on the Foodie Footsteps wall and only the group members will see them. I felt kinda silly creating my own group, but if you've spent any time on Facebook, you know that there have been far far more silly groups formed! Just click on the button in my sidebar to join!

The Ultimate Chocolate Brownie (and a lunch, too!)

First the lunch, then the brownies...

Snail Sandwich Roll-ups, Babybel Cheese, Baby Carrots, Ultimate Chocolate Brownie, Apple chunks topped with Feed Coconut Cranberry Granola

Snail Roll Ups are just sandwich rolls (in this case goat cheese, red bell pepper, and spinach) stuck onto a pickle spear. I used green toothpicks for the antennae. The chic walked in while I was making them and said, "awwww, how cute" before she said, "Oh, I'm not supposed to see it" and ran out. They ARE cuter in person than in the picture.
Now for the brownies...
Brownies are my weakness. I cannot resist that slightly crunchy crust atop a chewy fudgy center. Mmmmm! I saw a brownie recipe a long while ago that caught my attention just by the mere outrageousness of it. I swore that the next time I was having a serious chocolate craving, I would make them. Time passed and I forgot about the recipe...until last week when I was cleaning up my Internet bookmarks and it came up. I'm supposed to be on a diet which just makes my sweet tooth go into overdrive. I decided that I just had to try them before I forgot about them again.

I have to admit that occasionally I make things that I'm just embarrassed about because they are so blatantly unhealthy. These brownies are one of those things! The hubs came home and asked what kind of brownies they were and I said, "Just eat one and then I'll tell you". Well, around our house you can never tell exactly what that means. I've made the brownies with spinach puree, applesauce, peppermint candies, whole wheat pastry flour, etc...so he was a little apprehensive. He finally made me admit what was in them before he would try one and I had to confess...TWO GIANT MOVIE SIZED SYMPHONY BARS. That's right, movie sized. Symphony bars are those chocolate bars with toffee pieces and nuts. Kinda like a poor man's version of a Toberlone (my other weakness).

So you mix up a box of brownie mix and put it in the pan. Lay the two GIANT sized candy bars on top and then mix up another box of brownie mix. Pour it over the top and bake. I seriously read the directions about ten times cause I was absolutely sure that there was no way THAT much chocolate was supposed to be used. But it was...and ya know what? It was fabulous! You're supposed to wait to cut them till they're cool, but I thought that the hot brownie with the melted chocolate center was just about the most heavenly thing ever. The hubs and I decided that they were so so wrong, yet so so right!

Supposedly you can make them with any GIANT sized candy bars, so I'm thinking Carmello's are next! AFTER my diet!

Back to the Laptop Lunchbox!

So after several days of weirdness, we are back to the good ole Laptop Lunchbox and I couldn't be happier about that!

Tofu is a staple in our house. We've never made a big deal about whether or not they eat it and it's always been served very nonchalantly. It's just another protein. They learned to like it before their friends and family could voice their own opinions about tofu. My father really hates it (although I'm not sure he's actually ever eaten it?) and he and the oldest chic go around and around about it. It's gotten to be a game to them. She says she loves it, he says, "Gross!" and she just keeps rubbing it in his face that she loves something that he thinks is gross. We even threatened to make him a tofu birthday cake last year, but I could never find a recipe. (Anyone got one?) Anyway, she saw the package of tofu in the fridge the other day and asked me when I could make it. So, here it is...

Udon Soup, Asian Pear, Powerball, Carrot/Cucumber ring (I had one leftover from yesterday), Sesame Crusted Tofu with Teriyaki Dipping Sauce

The sesame crusted tofu is ridiculously easy. Drain a package of firm tofu (tofu should really be on your "must buy organic" list if at all possible). Press the liquid out as gently as possible between paper towels or a clean kitchen towel. Slice and press again. The drier the better! Brush each piece with teriyaki sauce, tamari, soy, whatever you like, and then roll in sesame seeds. Pan fry in a bit of oil until golden. (Maybe not as golden as mine are, but I was arguing with the chics about whose Twinkle Toes shoes are whose!) So, that's it. Yum!

Here's the soup that I make when the chics want "noodle soup". It's really just a base idea and can be adjusted to whatever veggies you have on hand. This is what I did today.


Speedy Udon Soup for One

1/2 package Cooked Udon Noodles

3 Baby Carrots

3 Sugar Snap Peas

1/4 cup Shelled Edamame

1 cup Beef broth (low sodium)

pinch Five spice powder

pinch Curry Powder

Place Udon noodles in a bowl. Mix remaining ingredients together in a small saucepan and bring to a boil. Boil 10 minutes or until veggies are softened. Pour over noodles and stir until noodles separate. (I find that pouring the hot soup over the cold noodles helps cool the soup just enough for little mouths!)

And if you haven't visited Laptop Lunchbox's blog lately, you need to! Their last blog post was about Foodie Footsteps! I was thrilled and honored to actually be mentioned on the site that started me on this whole lunch journey. We LOVE our Laptop Lunchbox!!

Lunch Jars are the new Thermos

School lunches seem so short. The chic gets 30 minutes and by the time they get in their seats and get their lunches out, it seems like 10 minutes has already passed. She is allowed to use the microwave to re-heat food, but that just takes more time out of her already precious lunch. So, I went looking for a thermos so she could take warm foods in her lunch without having to use the microwave.

I soon discovered that what I knew as a thermos has been re-styled and re-named a "Lunch Jar". It sounds so fancy. I imagine some really sophisticated looking woman lounging on a chaise with a super breathy voice saying it really slowly..."L u n c h J a r". And did I mention that they are ridiculously expensive? I spent twice as much on a "Lunch Jar" as I do on insulated Starbucks mugs! But, what are ya gonna do? So, since we've had a streak of Fall weather, I made soup. And since she's got a new "Lunch Jar" burning a whole in her lunchbox, she's taking soup tomorrow.


Tomato soup, Cheese sandwich, Edamame, Fruit Roll

We made Michael Chiarello's Tomato Soup cause he is awesome and the person to go to if you want anything fresh and full of flavor.

I decided to defrost an ice pack and refreeze it in the bottom compartment of the bento box. I'm hoping that will do a good enough job of keeping her sandwich cool. (fingers crossed)

The chic has her first Field Trip Tuesday, so I'm trying to come up with something yummy that doesn't have to be refrigerated. They also want to be able to throw all the packaging away. Ugh! I've got my work cut out for me. Especially since it also has to contain "flowers or faces or anything pretty"! :)

Turkey Meatloaf Muffin

The chics always like it when we make food in a miniature version. Meatloaf is a great food to make in all sorts of shapes and sizes and by using turkey and adding a buncha veggies, you can make a pretty nutritious meal. Fortunately, the oldest chic has a microwave in the dining hall, so she's able to take meatloaf for lunch.


Cucumber slices with sesame seeds and rice wine viniagrette, Powerball, kiwi stars with pomegranate seeds, turkey meatloaf muffin

Any meatloaf recipe can become meatloaf muffins. For turkey, spray your tins, fill and bake at 400 for about 25 minutes. A 1.3 lb package of turkey makes about 12 muffins. I use The Joy of Cooking's Classic Meatloaf recipe and substitute turkey for the beef and add shredded carrots, red bell peppers, and mushrooms.

Powerballs are kinda like a no-bake cookie but a bit healthier. This is a great kitchen project to get the kids involved in! There are tons of versions of these little guys, but here's the one I use:

Powerballs

1 cup honey

1 cup natural crunchy peanut butter

3 cups old fashioned oatmeal
1/2 cup ground flaxseeds
1 cup chocolate chips
1/2 cup pecans, toasted and chopped
1/2 cup dried cranberries
1/4 cup raisins

Mix the honey and peanut butter together in a large bowl. Add oatmeal and flaxseeds and stir until well incorporated. Mix in remaining ingredients. With slightly damp hands, roll into a 1 1/2" balls. The mixture is very sticky. I also like to use a cookie scoop for this! Place balls in mini muffin tins and refrigerate overnight. I then freeze them in a large ziploc bag. Makes 48.